Getting Started
This chapter takes you from a fresh install to paint on the canvas: what Paintrix Studio is, what you need, and the handful of controls you will reach for first.
What Paintrix Studio is
Paintrix Studio is a painting app built around a Metal renderer, so every brush, filter and distortion runs on the GPU. It is a studio rather than a sketchpad: 60 brushes across nine families, layers with real adjustments, gradients and materials, symmetry, selections, a clone stamp, live collaboration with a partner, and a timelapse of everything you paint.
It runs on iPad and on iPhone. The interface rearranges itself for each one, but every feature is the same feature. Where a step differs between devices, these pages say so.
What you need
- An iPad or an iPhone.
- Paintrix Studio from the App Store. Every brush and every tool is included.
- Optional: an Apple Pencil. Pressure, tilt and hover all work the moment you pick it up, and Apple Pencil Pro adds squeeze to undo.
Nothing else to set up. There is no account to create and no sign-in before you can paint.
The first-run tutorial
The first time you open a canvas, Paintrix Studio runs a guided tour. It dims the screen, spotlights one control at a time and explains it in a sentence or two, walking the toolbar, the layers panel, the palette and the settings menu in the order they sit on your device.
Tap Next to move through it, or Skip Tutorial to go straight to painting. You are not locked out of anything either way.
You can replay the tour whenever you like. Open the settings menu with the gear button and tap the circled ? in its top right corner.
Your first painting
- On the home screen, tap + to create a canvas. Pick a template, set the orientation, and tap Create.
- Tap the brush button in the toolbar once to start painting. Tap it a second time to open the brush library, then pick something with texture: Aria in Oil Paints is a good first brush.
- Tap the color swatch and choose a color. Pick the hue on the outer control, then the shade in the square.
- Drag the size slider until the live brush-tip preview looks right, and set the fill slider around a third of the way up so color builds gradually.
- Paint. Two-finger tap the canvas to undo a stroke, three-finger tap to bring it back.
- Open the layers panel and tap + for a fresh layer whenever you want to work on something without disturbing what is underneath.
Your work saves itself as you go. There is no save button and nothing to remember to press before you leave.
What is on the screen
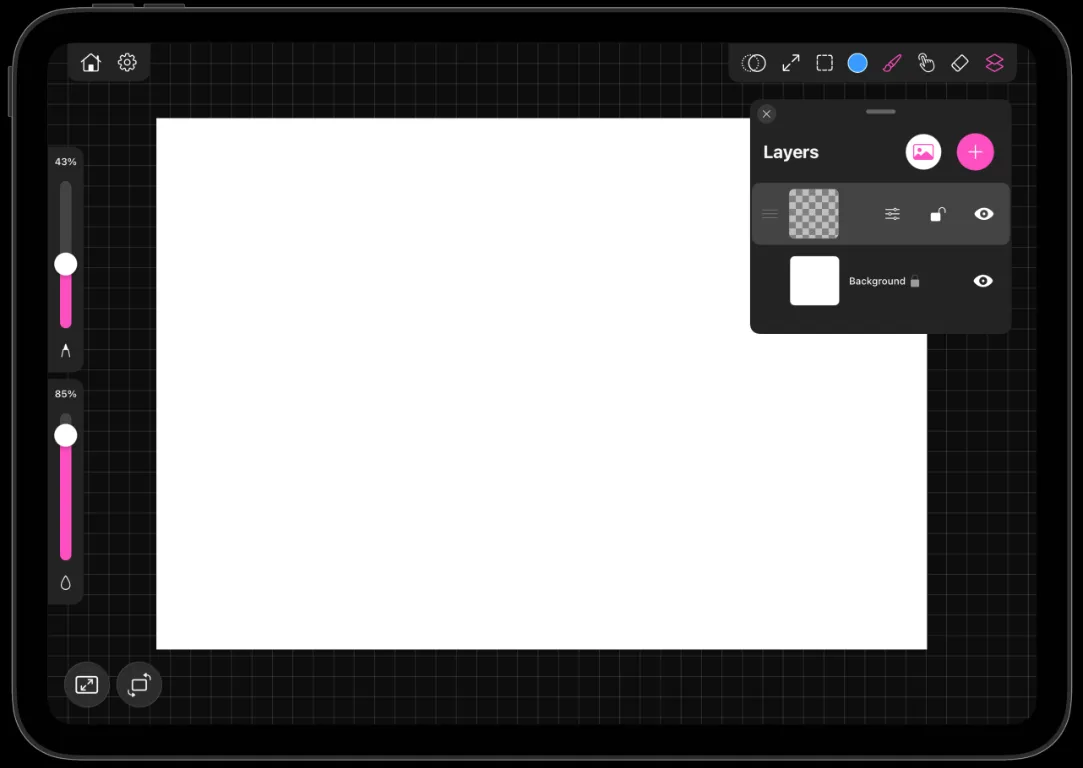
- The toolbar holds the tools: clone stamp, transform, selection, color, brush, distortion, eraser and layers. On iPad it runs along the top. On iPhone it splits into a capsule at the top and a row along the bottom.
- The sliders sit down one edge: brush size on one, fill on the other. Left-handed mode moves them to the other side.
- The panels float over the canvas and can be dragged anywhere by the grip at the top: layers, the palette, and the history list.
- The gear button opens settings, which is where collaboration, sharing, stabilization, mirror mode, timelapse and canvas resizing live.
The next chapter walks every one of those controls in detail.
What is free and what Pro unlocks
Every brush, every layer, every tool and every export is free and unlimited. You can create as many canvases as you want and work on them for as long as you want.
A Pro subscription unlocks one thing: reopening a project you saved earlier. New work is always free to start and free to finish in one sitting. Coming back to it the next day is the paid part.
Already subscribed on another device? Open the menu on the home screen and choose Manage Subscription, or restore purchases from the upgrade sheet.