Layers
Your artwork is a stack of layers, so you can rework one part of it without disturbing the rest. The layers panel floats over the canvas and can be dragged anywhere.
The panel
Tap the layers button to open it. Drag the grip along the top to move it out of your way. The topmost row in the list is the topmost layer on the canvas.
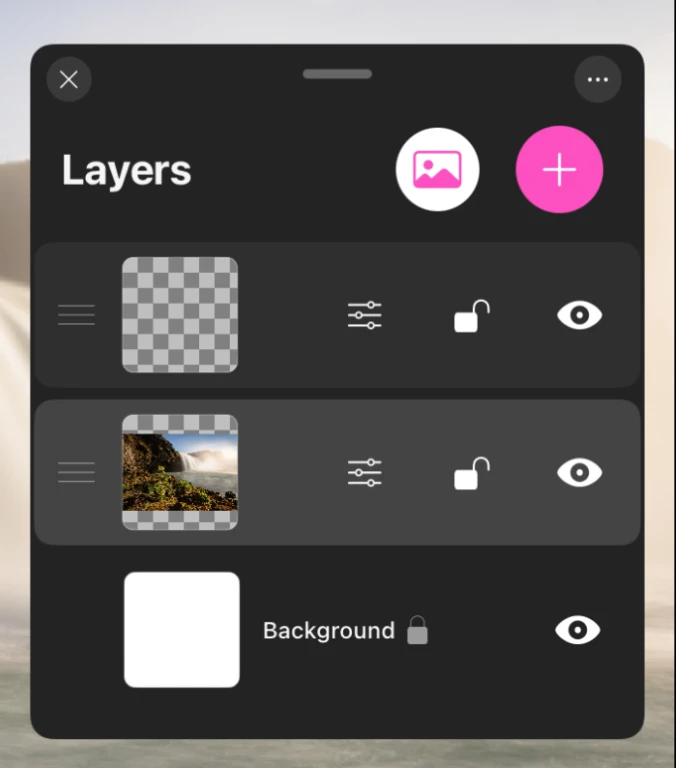
Adding layers
- + adds an empty layer directly above the current one.
- The photo button imports an image from your library as its own layer.
Past about 20 layers the canvas gets noticeably heavier, especially at large canvas sizes. Merge finished work down as you go and the app stays fast.
A layer row
Tap anywhere on a row to make that layer active. Everything you paint goes onto the active layer. The controls on the row are:
| Control | What it does |
|---|---|
| Drag handle | Reorders the layer in the stack |
| Sliders button | Opens the layer's adjustments |
| Lock | Protects the layer from any change |
| Eye | Shows or hides the layer |
Double tap the name to rename a layer.
Layer actions
Swipe a layer row to the left to reveal its actions.
| Action | What it does |
|---|---|
| Liquid | Melts and smears the layer like wet paint. See Liquid Mode |
| Duplicate | Makes a copy directly above |
| Merge | Combines it into another layer you then pick |
| Delete | Removes the layer, or clears it if it is the last one |
Merging
Choosing Merge puts the panel into merge mode and asks you to select the layer to merge with. Tap it, and the two combine. Exit Merge Mode backs out without changing anything, and an Undo button appears straight after a merge in case it was not what you wanted.
Merging all visible layers at once is also available. Hidden layers are discarded when you do, so unhide anything you want to keep first.
The background layer
The bottom of the stack is the background, and it is not a normal layer. It sets the base of the canvas and offers three modes:
- Color, a flat fill.
- Texture, either Canvas or Paper. Brushes with a texture component pick this up as they paint, so watercolor pools into paper grain and oils catch on canvas weave.
- Image, a reference photo with its own opacity slider. Use it to trace or to match a composition, and choose whether it appears in the timelapse.
A reference image on the background is the cleanest way to trace: it sits under everything, it does not export, and you can fade it with the opacity slider as your drawing takes shape.